Looking to get that Dynamics Navbar Logo just right for your Dynamics 365 / PowerPlatform app? Today I’ll focus on how to get the dimensions of your logo just perfect, as well as providing a download link to my Photoshop PSD file so that you can alter for future projects.
Continue readingCategory: Beginner Tips
Tip of the day, how to add Microsoft Flow Buttons to your Apple iPhone widgets screen. A very quick way of getting work done in my opinion #justswipeleft
The SharePoint Upload control was recently introduced to PowerApps, and I want to give a short demonstration of how it can be used. Firstly a little more information about the upload control.
The upload control has the following properties:
- 10MB File Size restriction
- Specific event triggers : OnAttach, OnRemove, OnSelect
- Must be embedded on a form for it to be enabled.
- Currently only works with SharePoint Lists with other upload data sources being made incrementally available in the future
- iOS devices can only upload from document and cloud storage accounts (if you have photos you want to upload, it’s best to use the camera control instead).
Here are the steps to get started with Upload Controls:
- Create an App with SharePoint as your data source.
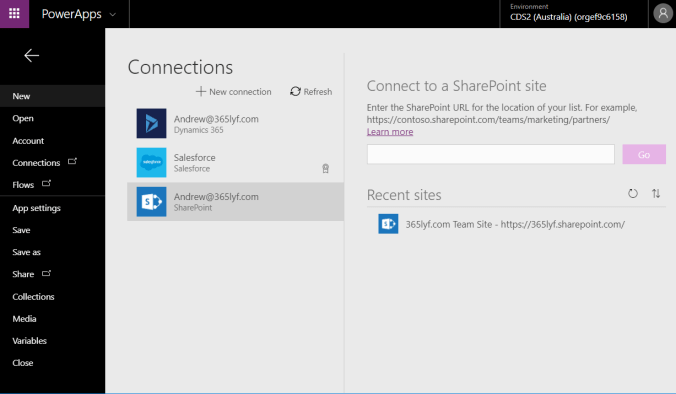
- Connect to a SharePoint Site and choose a list.
- The Canvas app has included the scaffolding for a vertical layout application complete with a list view of your SharePoint List, as well as a + button to add new records. Double Click on this + button.
- Click on the Form (hint: click on white space under all your fields) then click on Data
- Add the Attachments Attribute to the Fields list within the Data Source Window.
- Preview your app by pressing F5 or the Play button. Try uploading a file and click Save.
- (Optional) Now you probably want to preview your attached image against the record. Double click on the View Item Detail screen (hint: > button on the main list form).
- Click on the main form (hint again: > white space under your fields)
- Click on your Data (hint: right hand panel)
- Add Attachments field.
- Now F5 to preview.
- Clicking your attachments will allow you to download the file.
So as you can see it’s pretty simple to use, and works exactly as described. I look forward to further improvements to the upload control from Microsoft. If you have any feedback about this control, or something didn’t go exactly as you expected deploying your control, please do drop me a comment below and I will try to get back to you as soon as possible.
Additional Resources:
The following is a tip on how to show how often a product is being added to an opportunity. It involves create a rollup field that counts the number of related opportunities. Once you have this variable it is easy to include into charts, reports and views.
The following is a handy tip for appending the last modified date and user details to the description field of any entity. In this case I’ll be using the Phone Activity. This may be useful for providing a visual guide for your team members in quickly seeing a history log of when this record was last touched.
This troubleshooting blog post was written in response to a question on the community forum on how to change the resolution type label for cases.
When you click on Resolve Case you will see a pop up. With the options to change the Resolution Type to either Problem Solved or Information Provided.
To change this, goto Settings > Customize the System. Then navigate to Entities > Cases.
Click on Fields and Locate “Status Reason”.
Edit the Status Reason (StatusCode) attribute.
Change the Status dropdown from Active to Resolved
Edit the Label for “Problem Solved” and change this to a value of your choosing, in this case “Resolved”.
Click OK.
Click Save and Close. Then Publish All Customizations.
Now when you resolve a case you should see the new value reflected on the pop up dialog.
This blog post is aimed at users who are brand new to Microsoft Dynamics CRM or Dynamics 365 and after a quick start guide to importing Account, Contact and Lead Data into their Microsoft Dynamics instance.